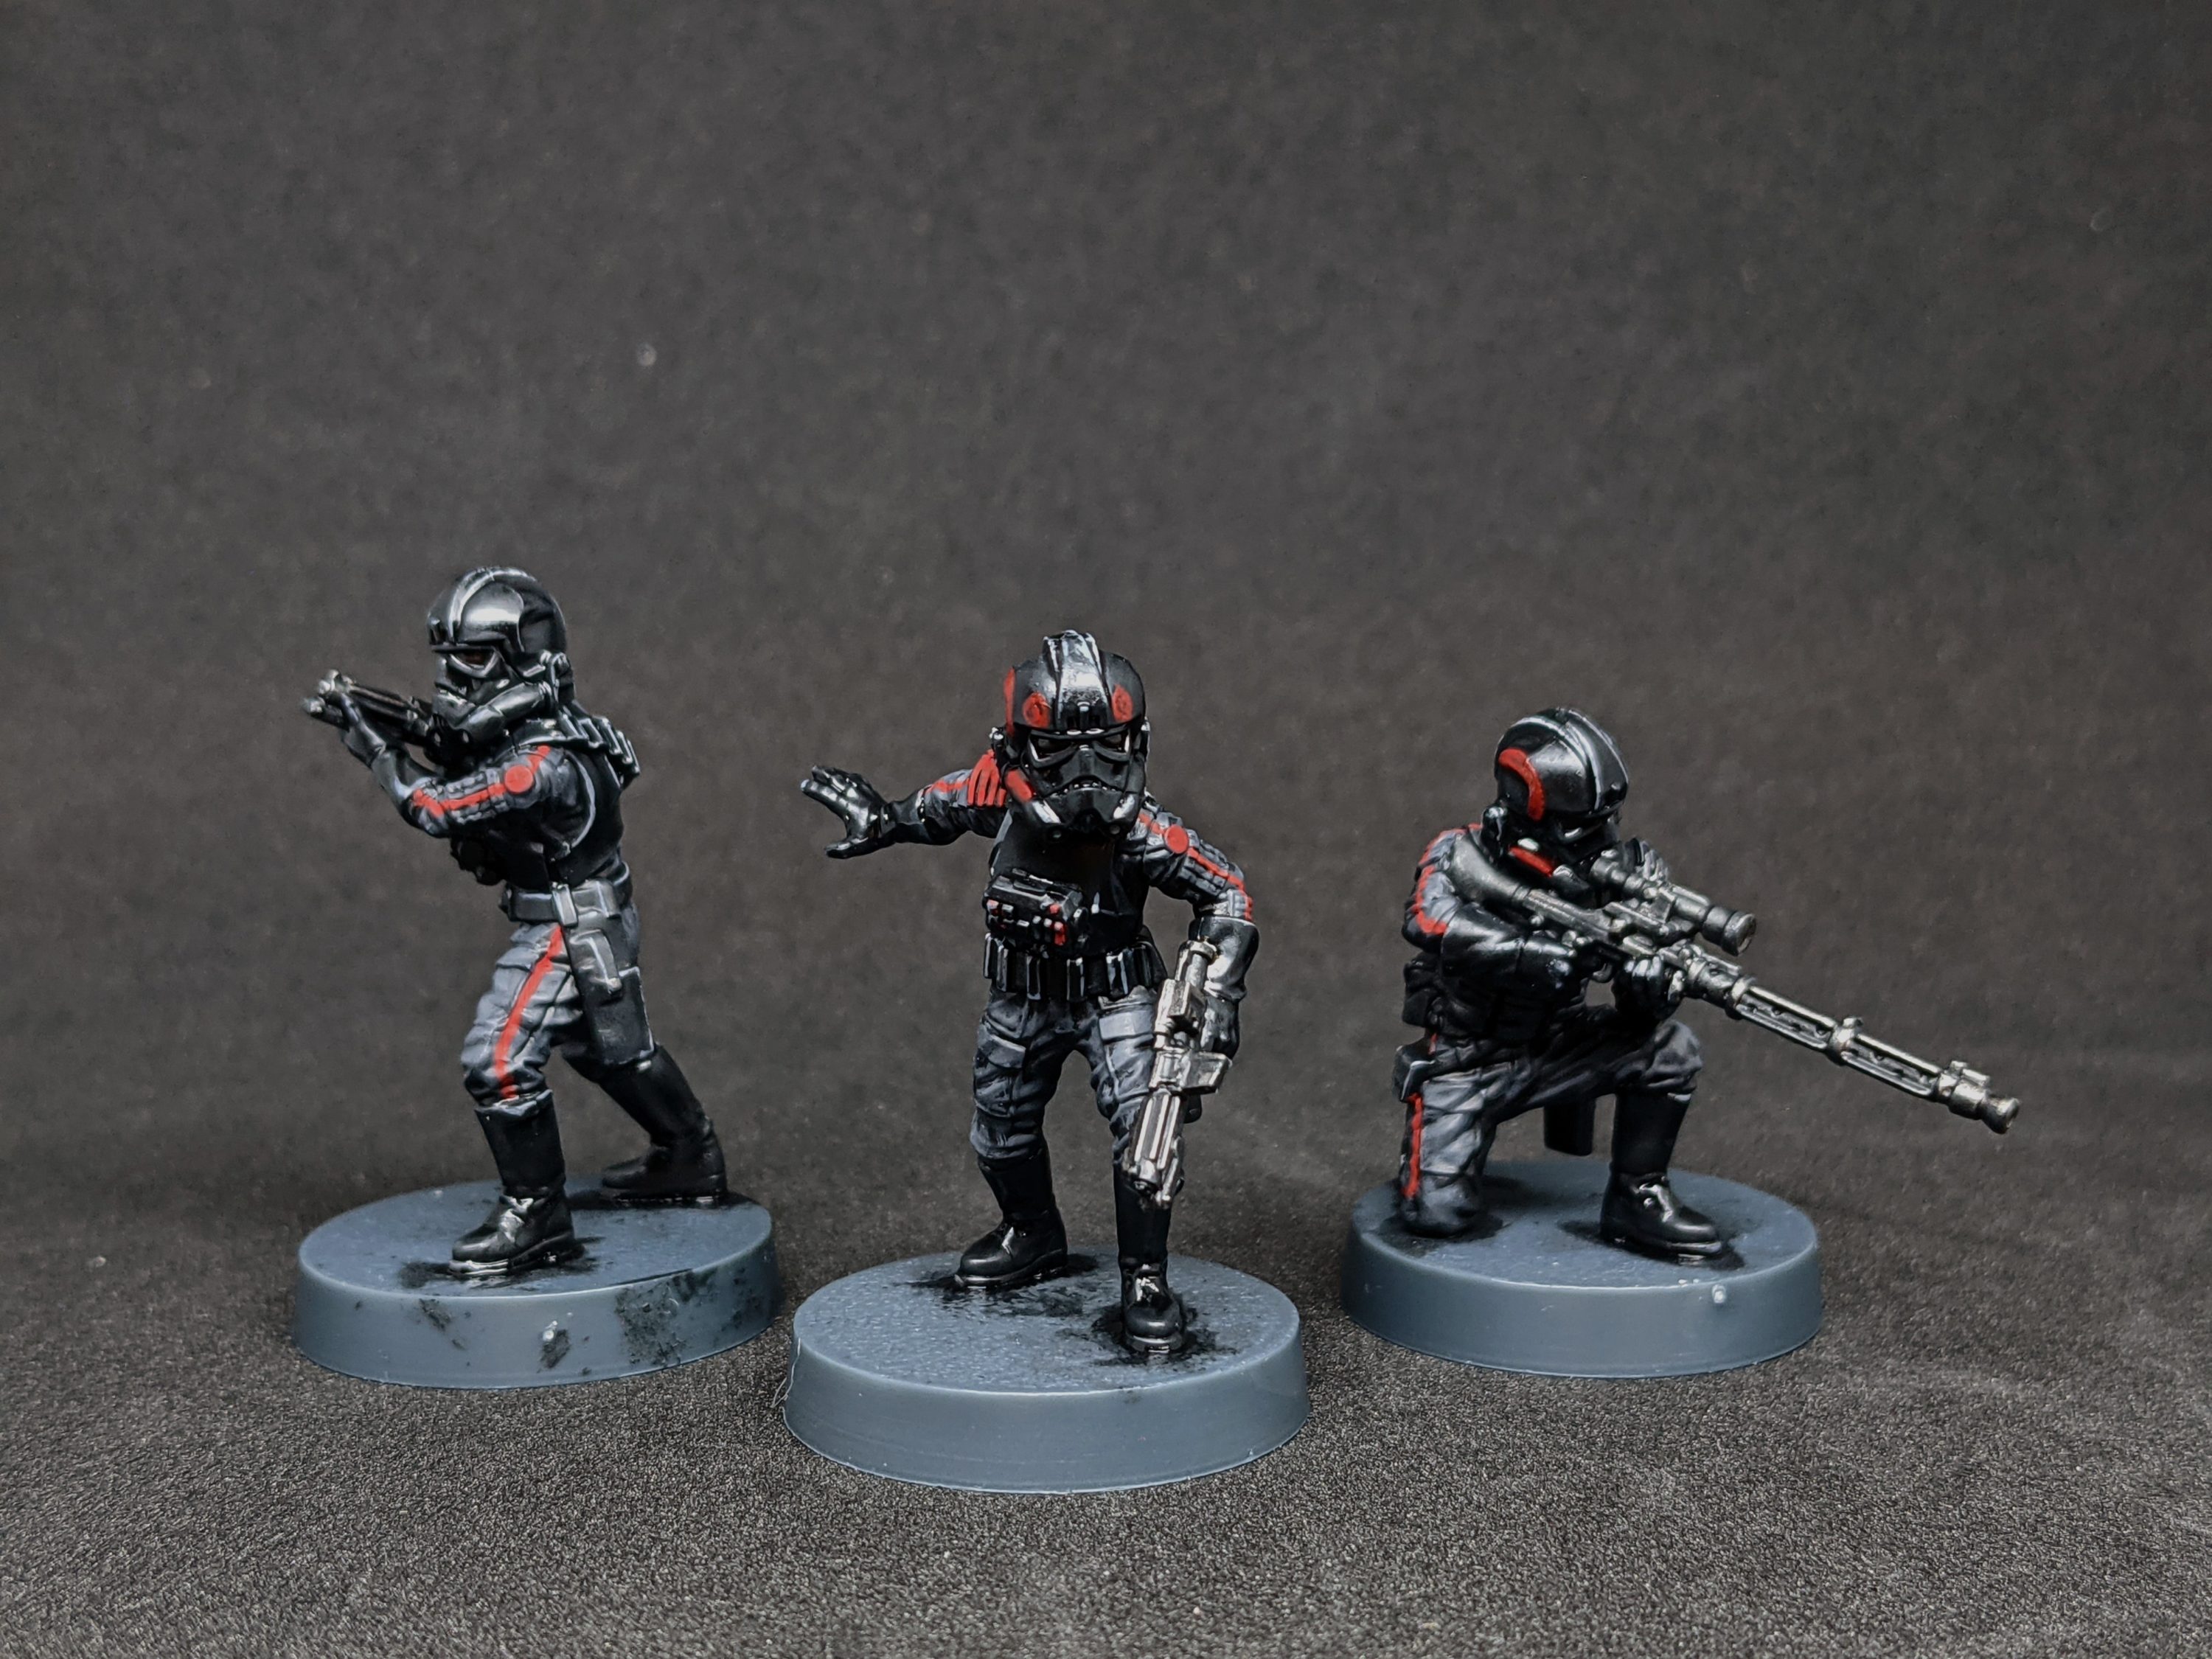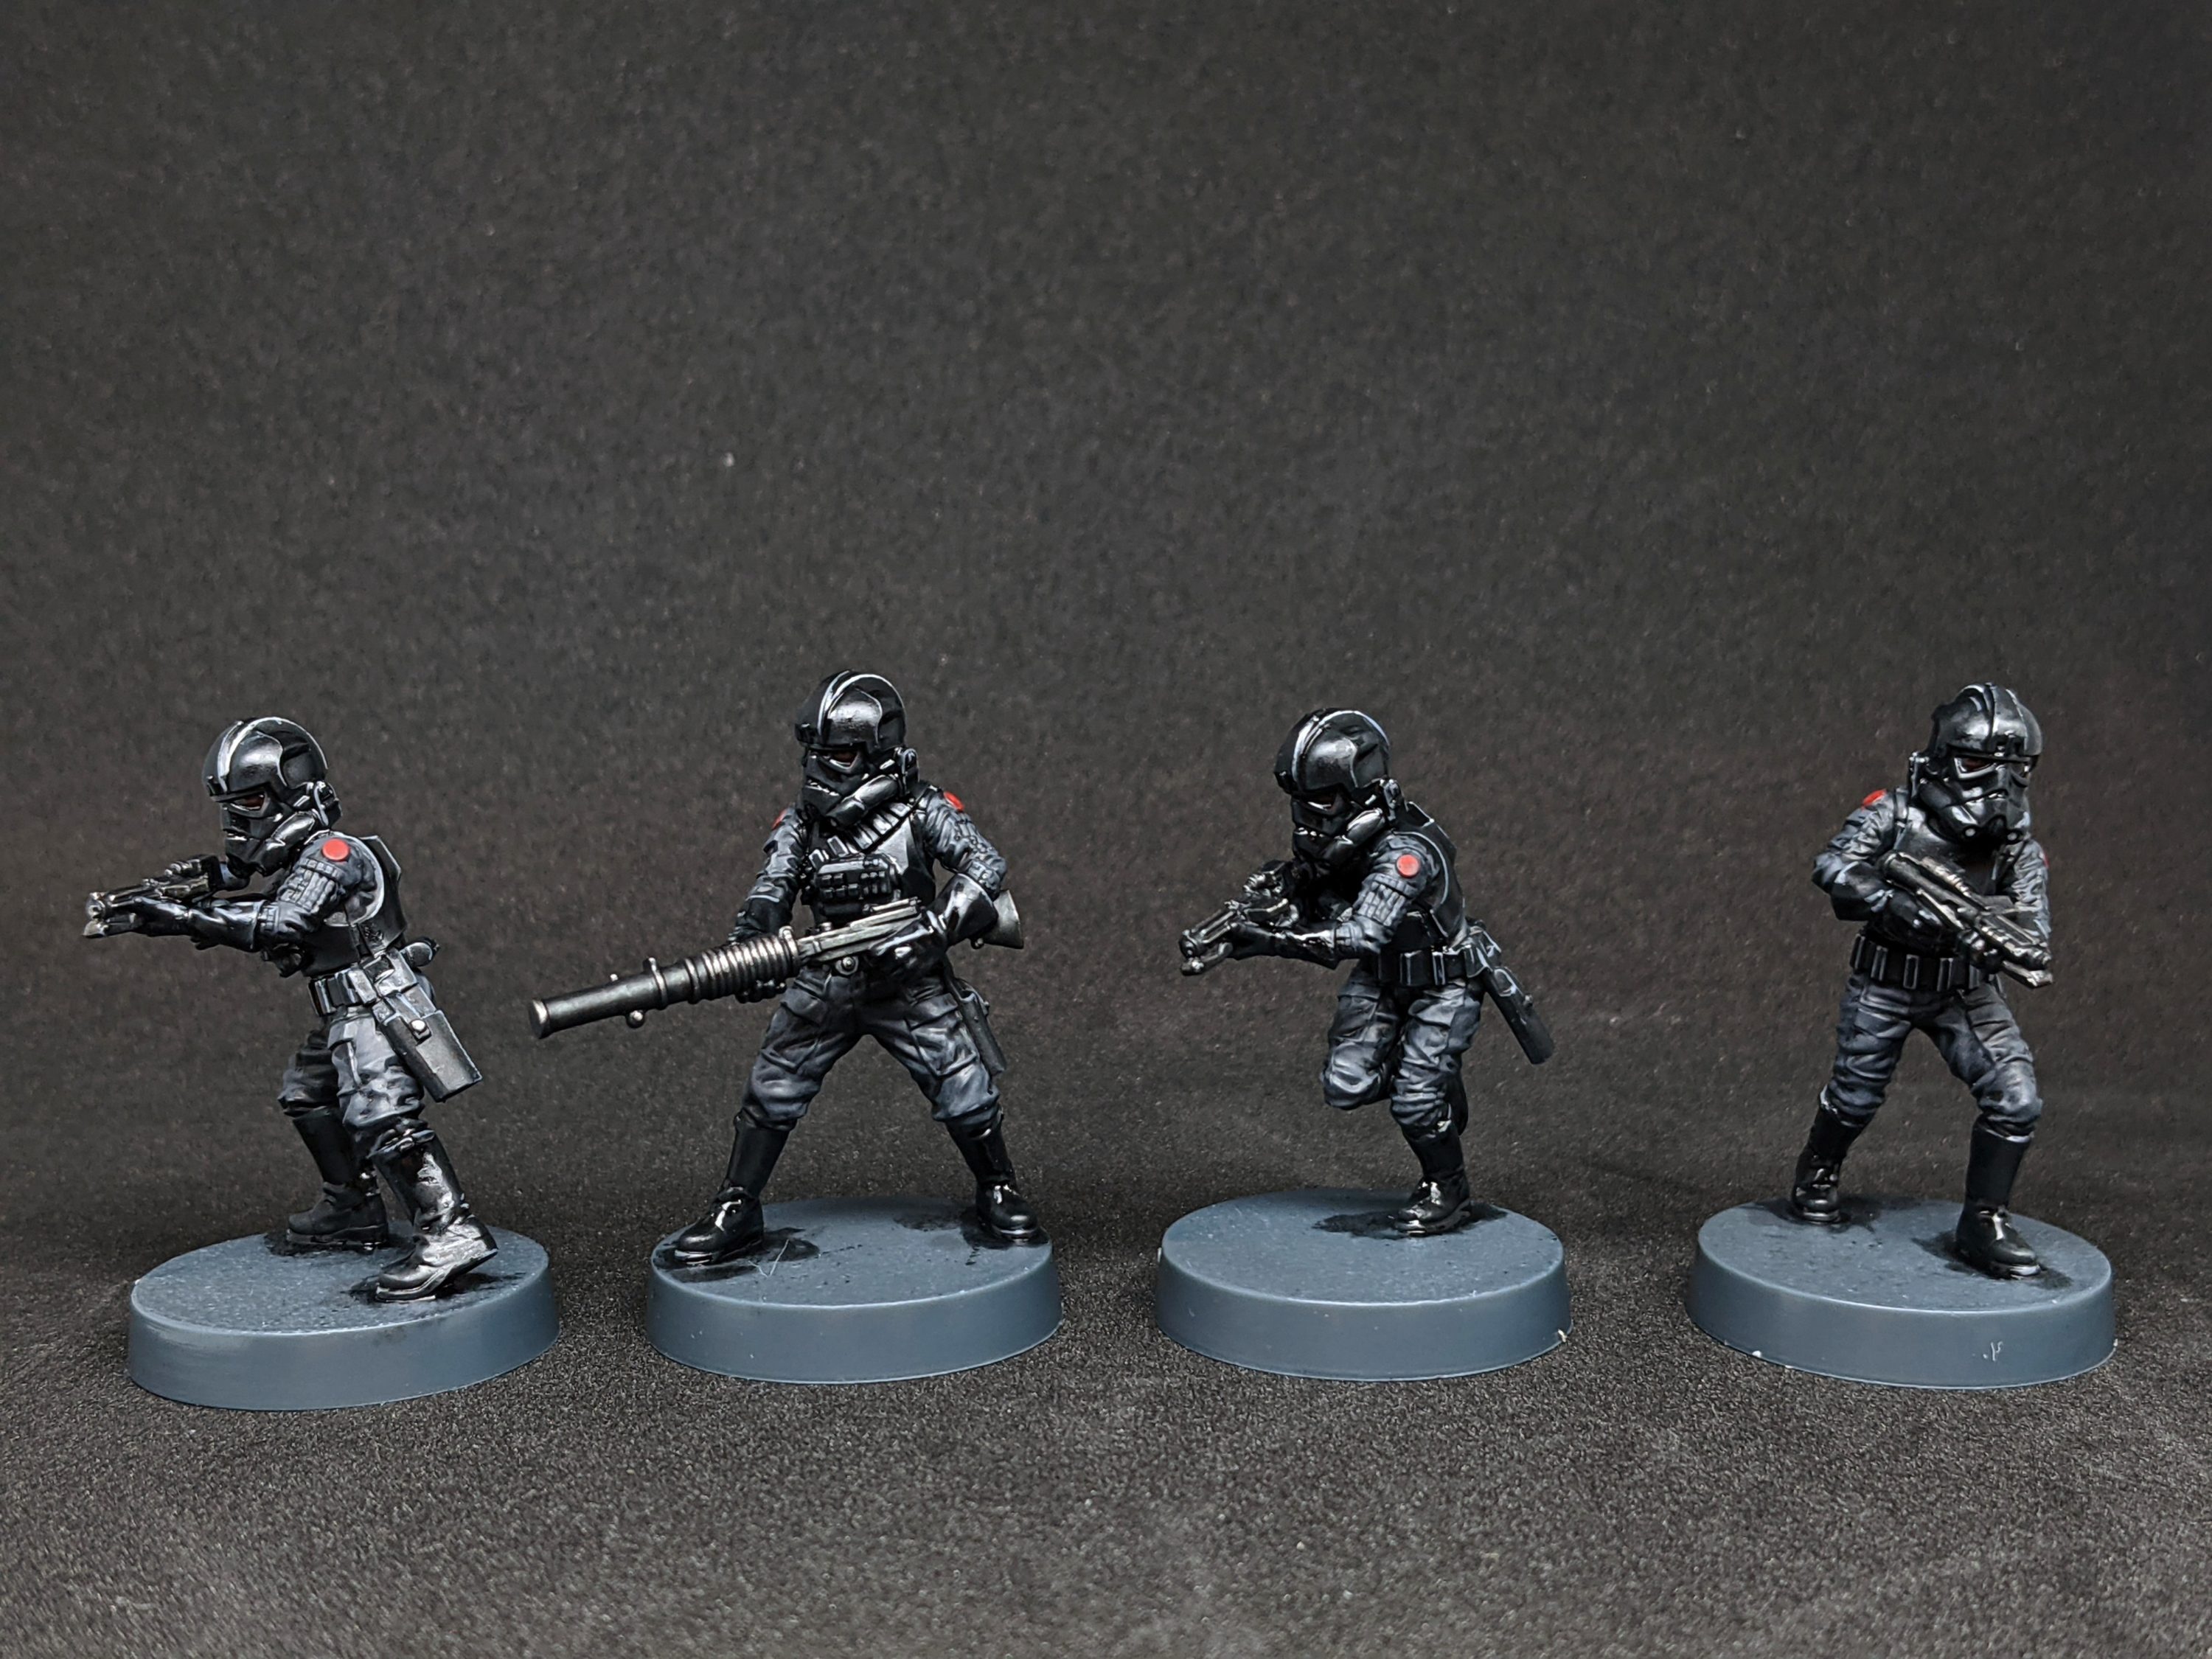
I recently picked up Star Wars Legion and decided I’d have a bash at painting a few bits from it. Turns out I managed to nail down a pretty good recipe for the black armour of Inferno Squad which you can use for them, Iden Versio, Darth Vader and the Death Troopers. Anything with shiny black plastic armour works!
I used a mix of Vallejo and Citadel paints for this one.
You’ll need:
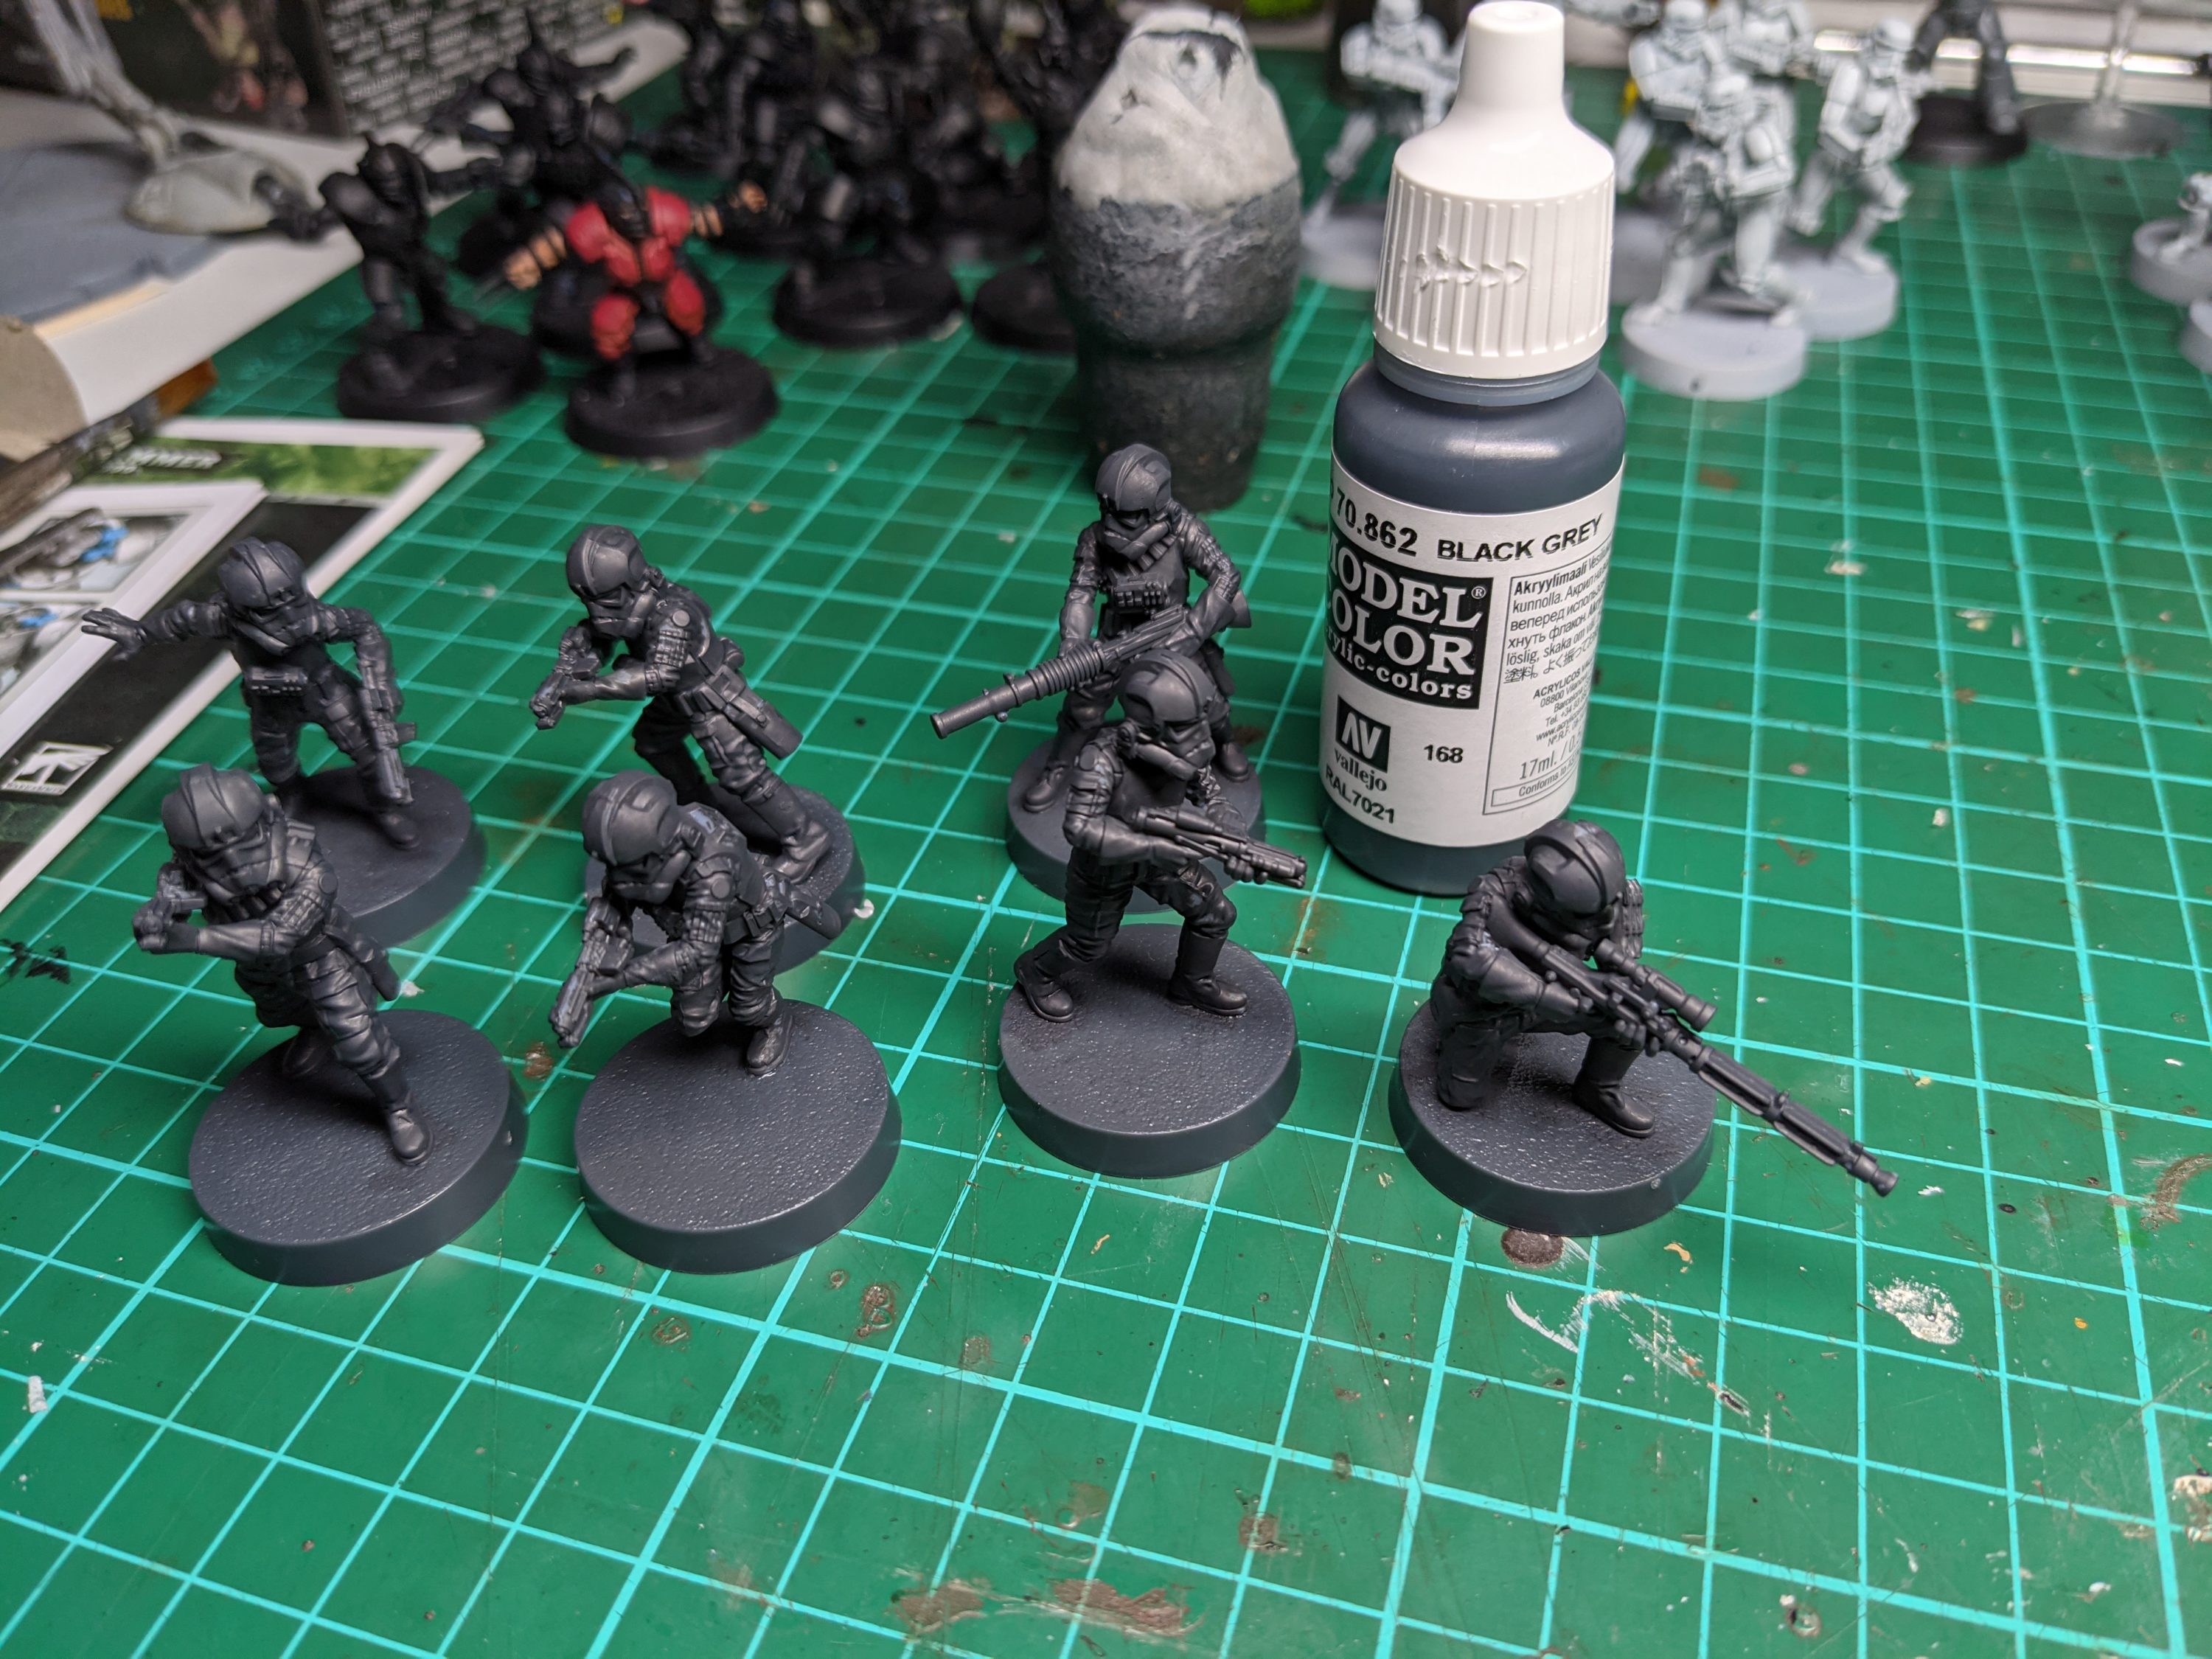
- Vallejo Model Color: Black Grey
- Citadel Contrast: Black Templar
- Vallejo Model Color: Dark Blue Grey
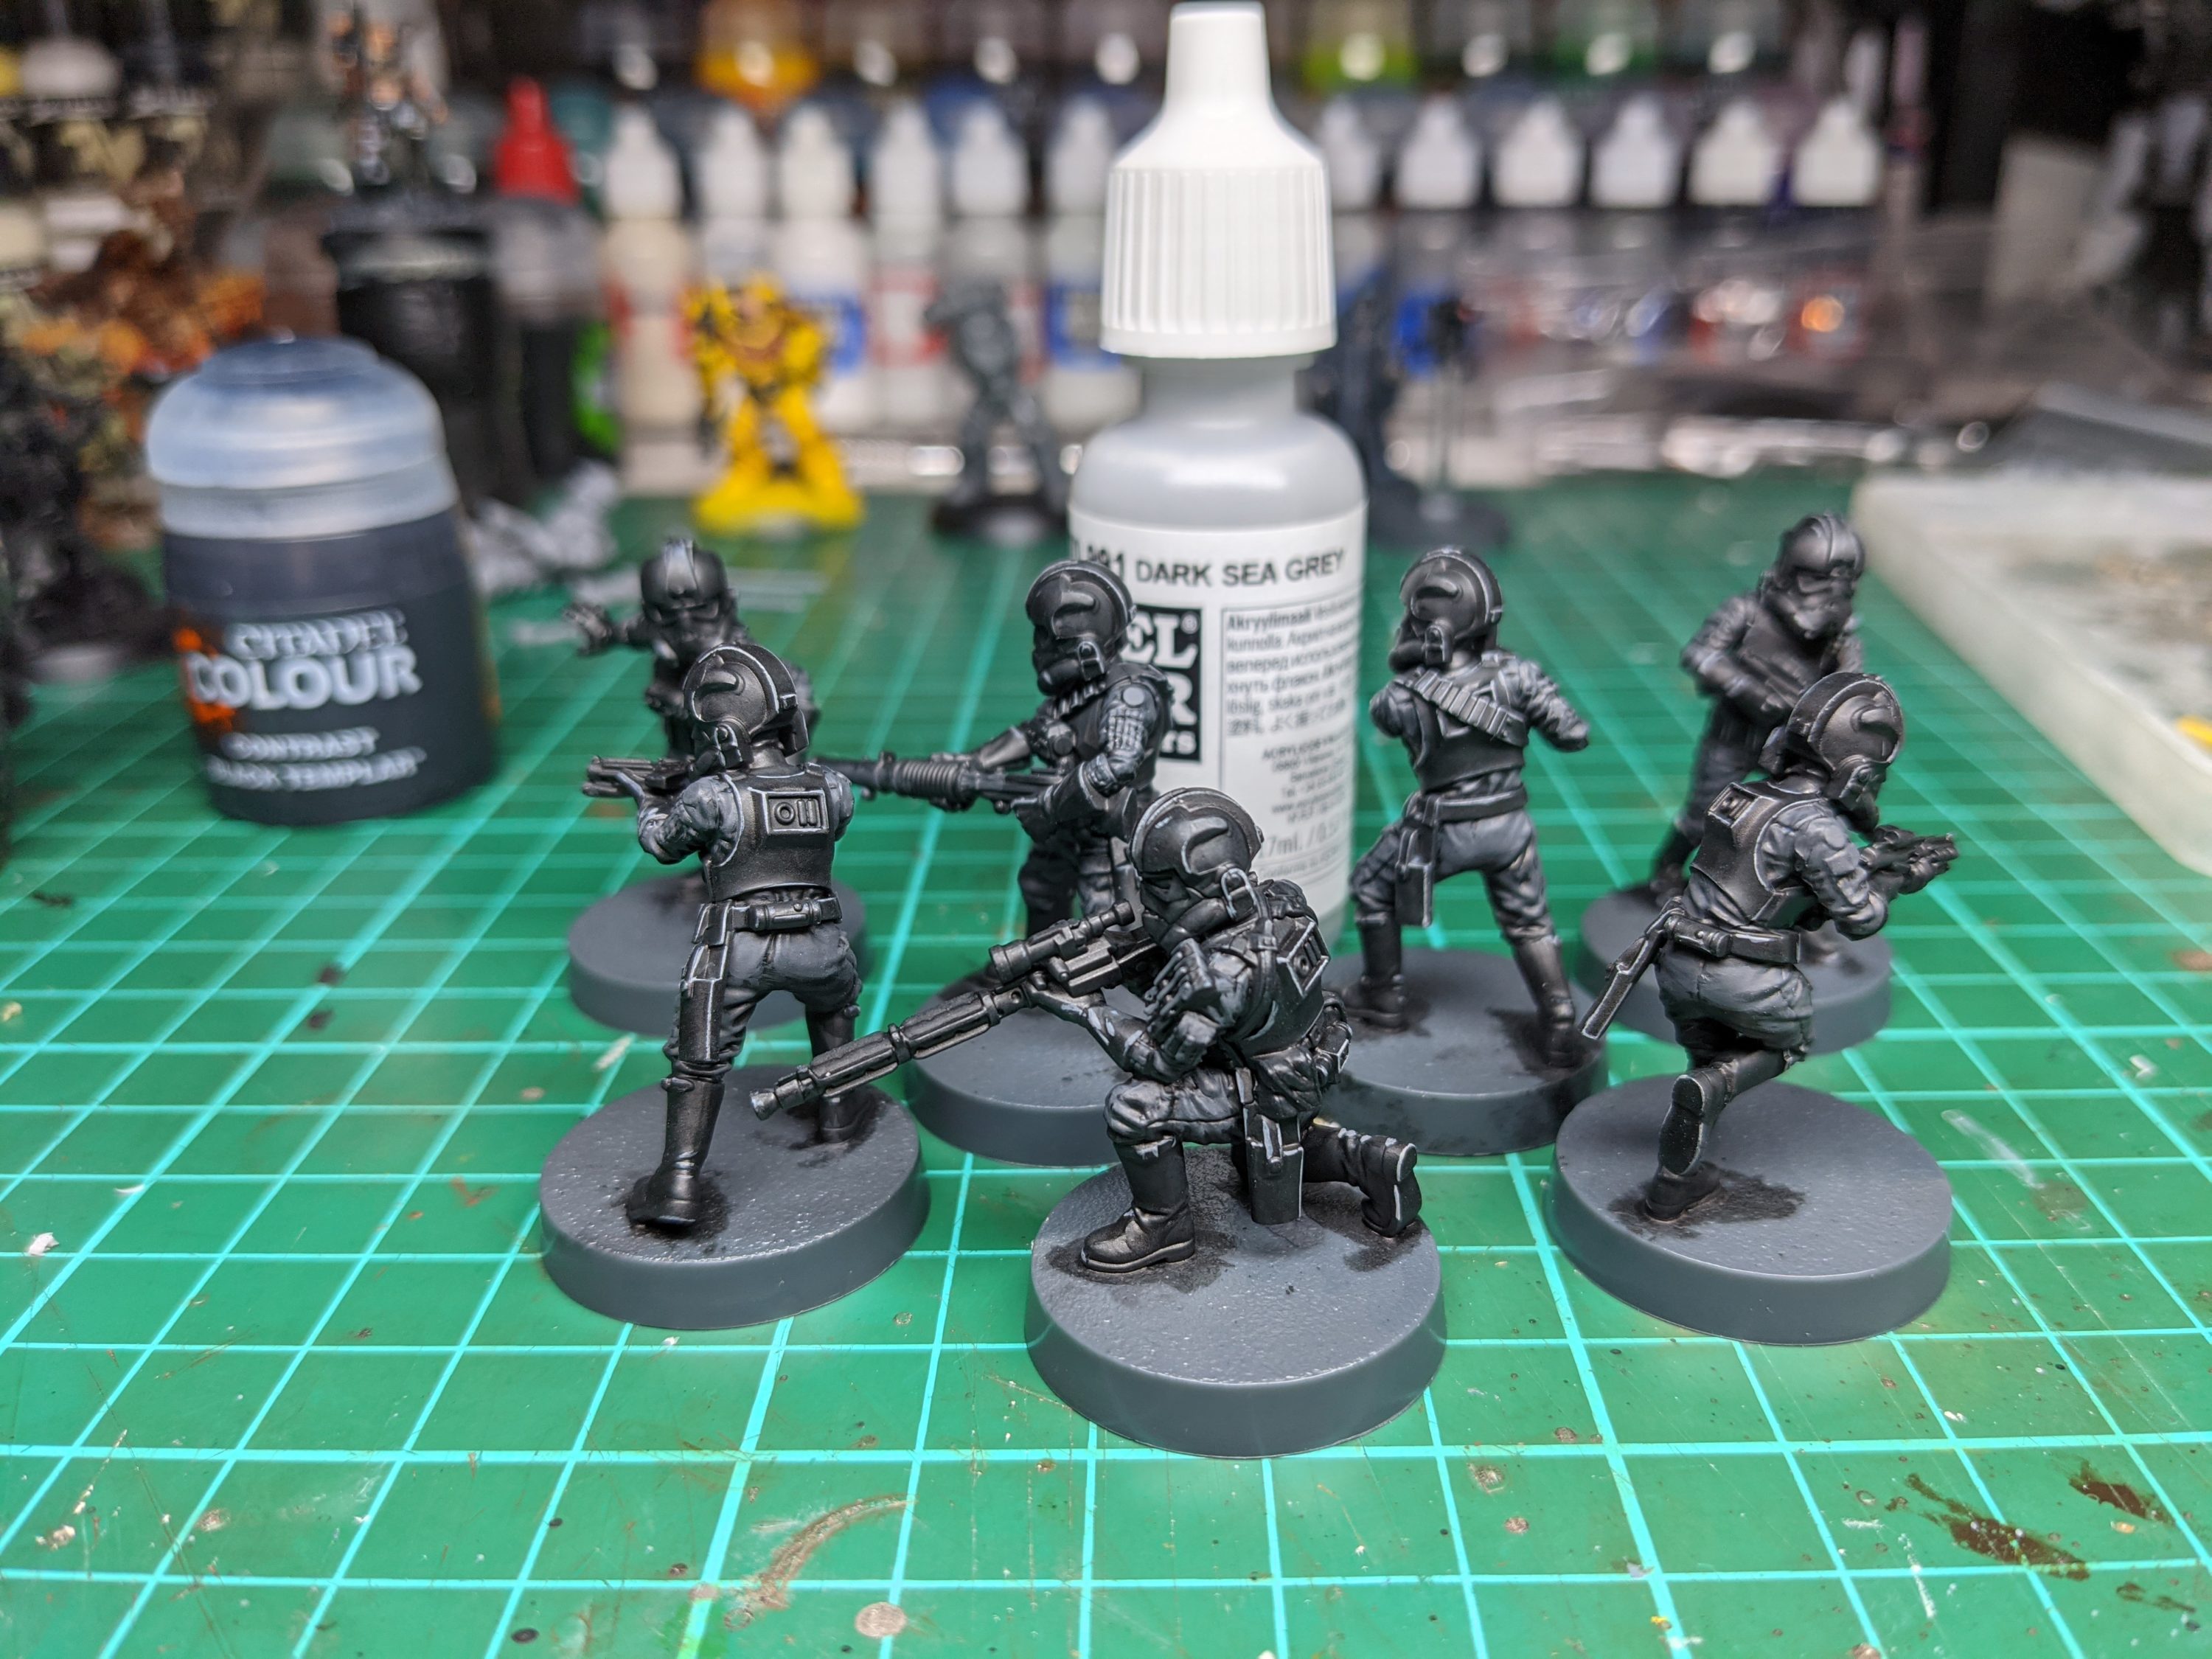
- Vallejo Model Color: Dark Sea Gray
- Cidadel Layer: White Scar
- Cidadel Base: Mephiston Red
- Vallejo Metal Color: Jet Exhaust
- Citadel Shade: Nuln Oil GLOSS
First, you’ll want to base-coat everything in Vallejo Black Grey.
Then give everything a good wash with Citadel Contrast Black Templar. This will give you an almost black finish, but should provide a bit more in the way of contours and highlighting than just priming with black does. It’s also a nice matt finish to start with.

After that, revisit some of the raised areas on the material with Black Grey. This is to lighten the folds of anything not glossy like under-suits, trousers and so on.

Continuing on the same areas, you can give a bit more of a highlight in Dark Blue Grey. This should help build the contrast.

Next up you want to do your edge highlighting – the tighter the better on this one – especially on the armoured areas. Edge highlight all the upward facing edges in Dark Sea Grey.
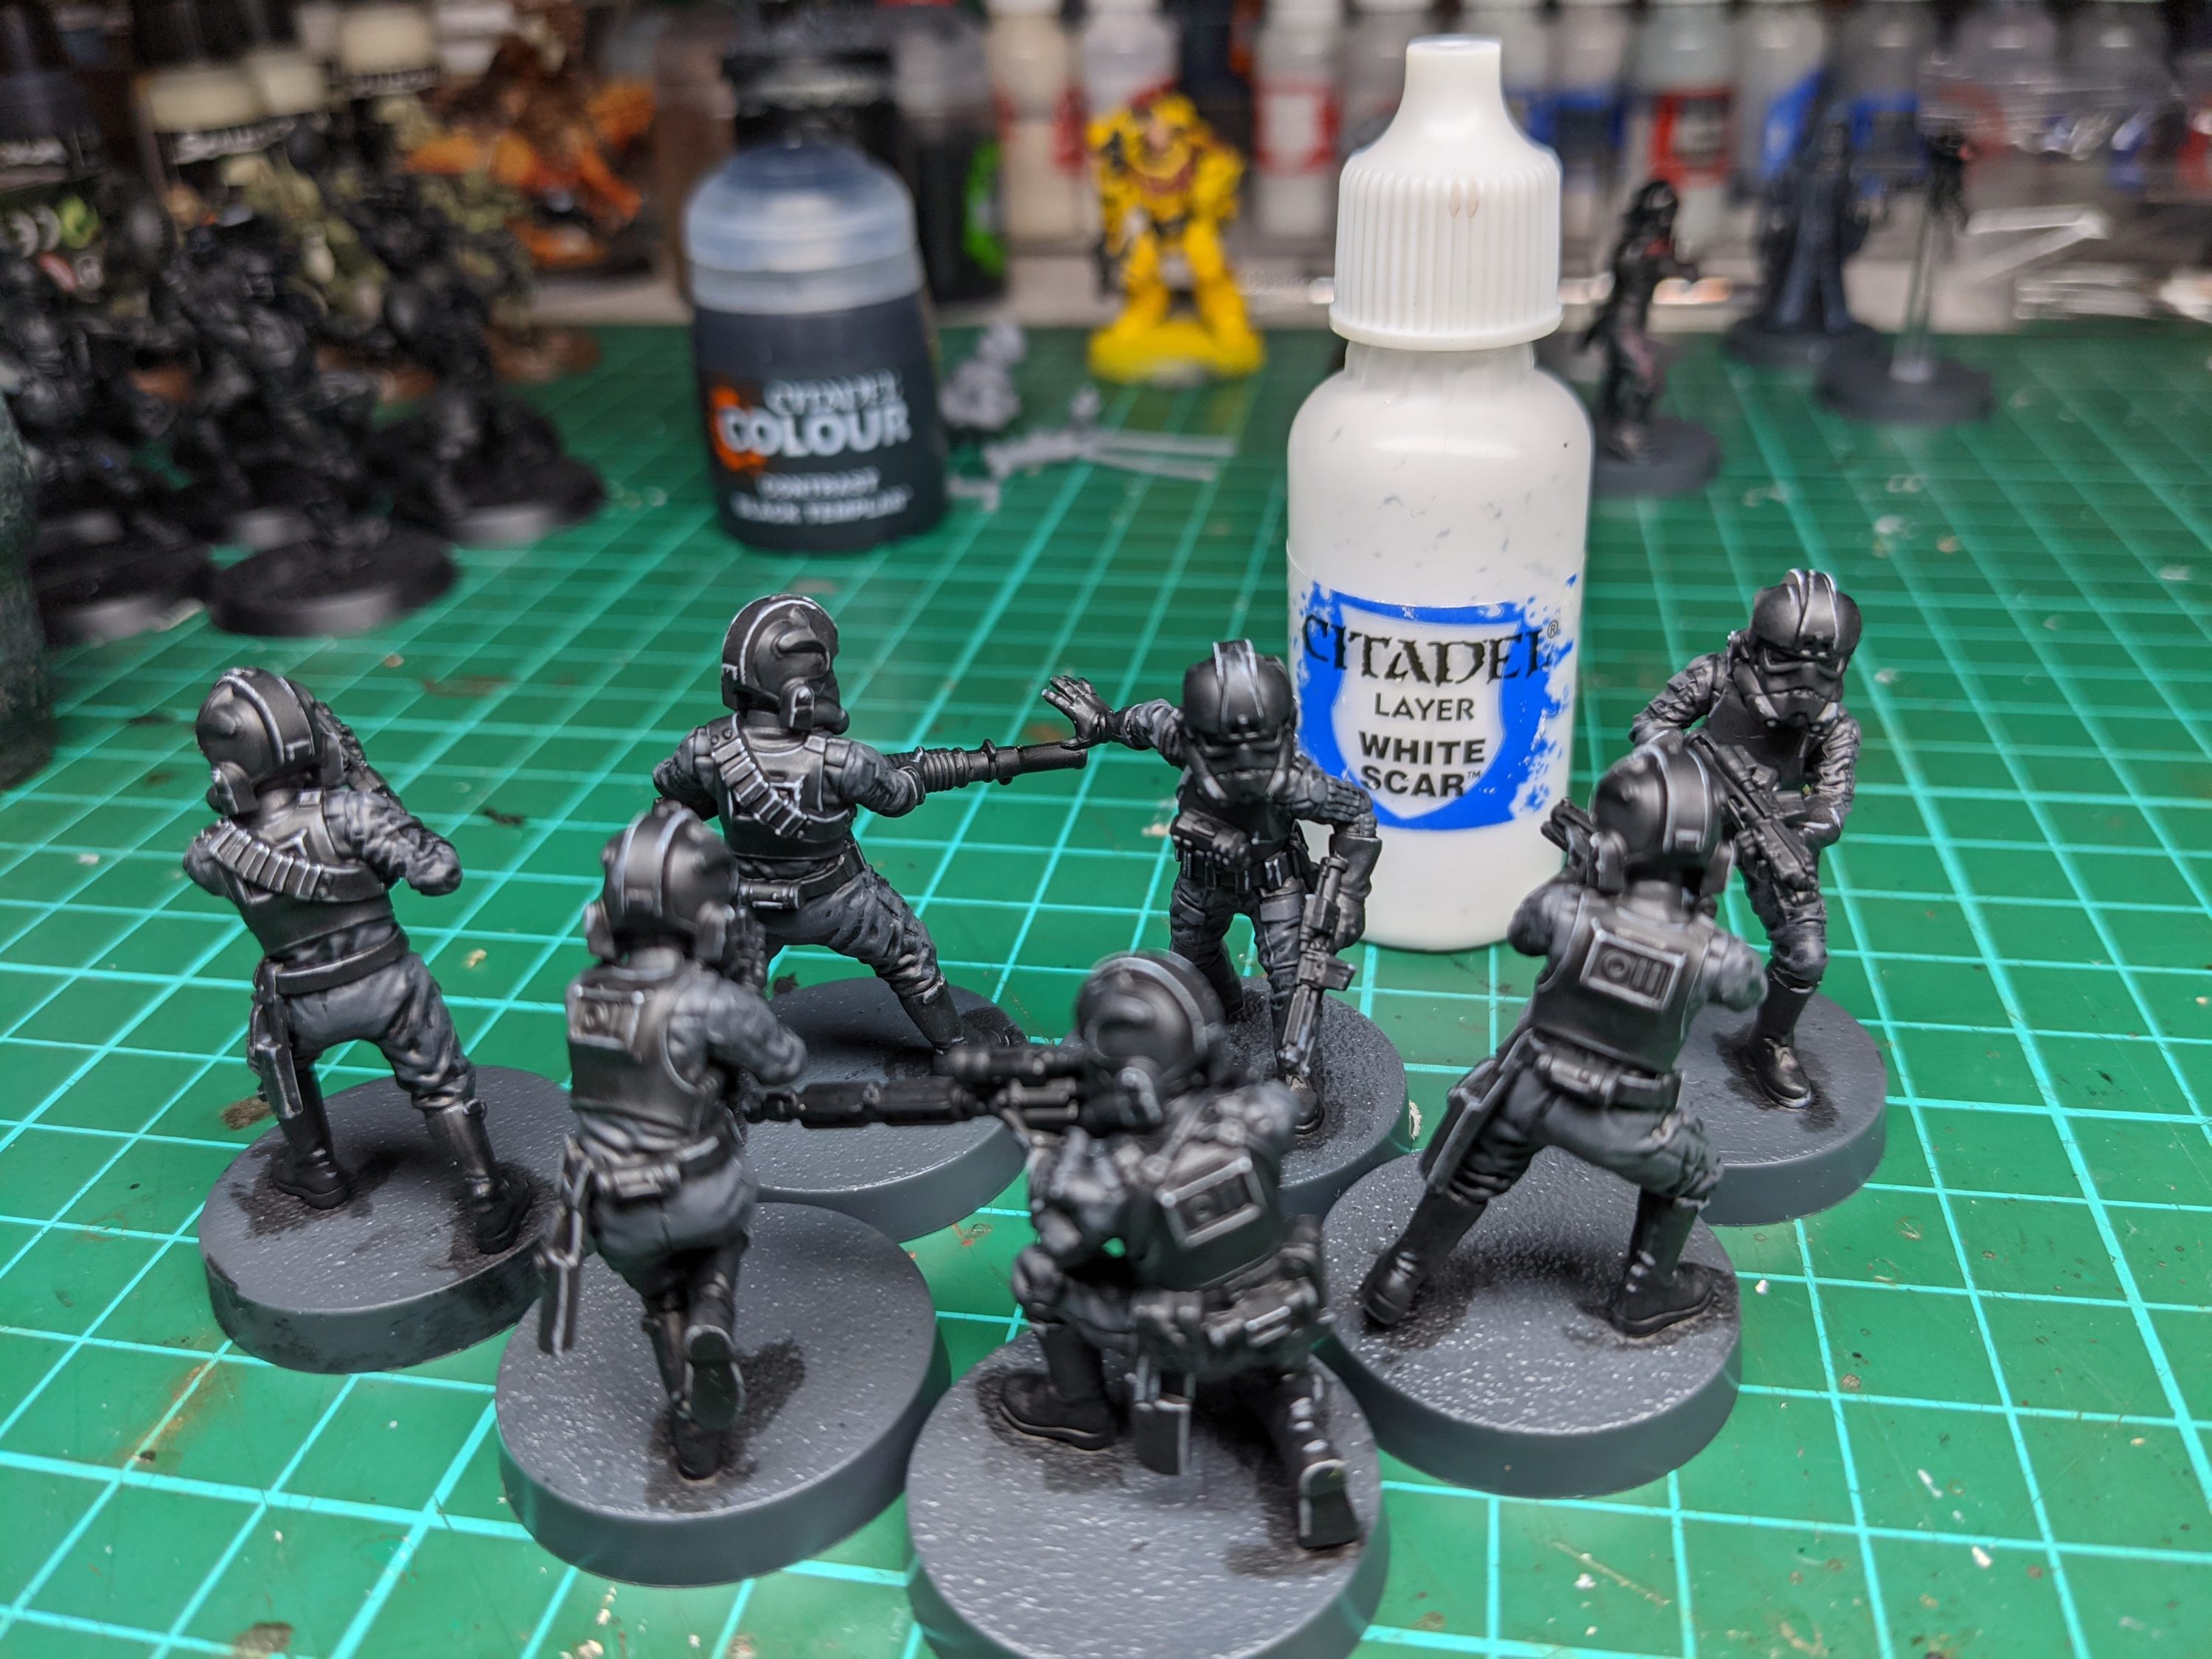
From there we want to emphasise any points, so on corners add a dot of White Scar or any other pure white you might have. This gives the armour a bright specular highlight type effect.
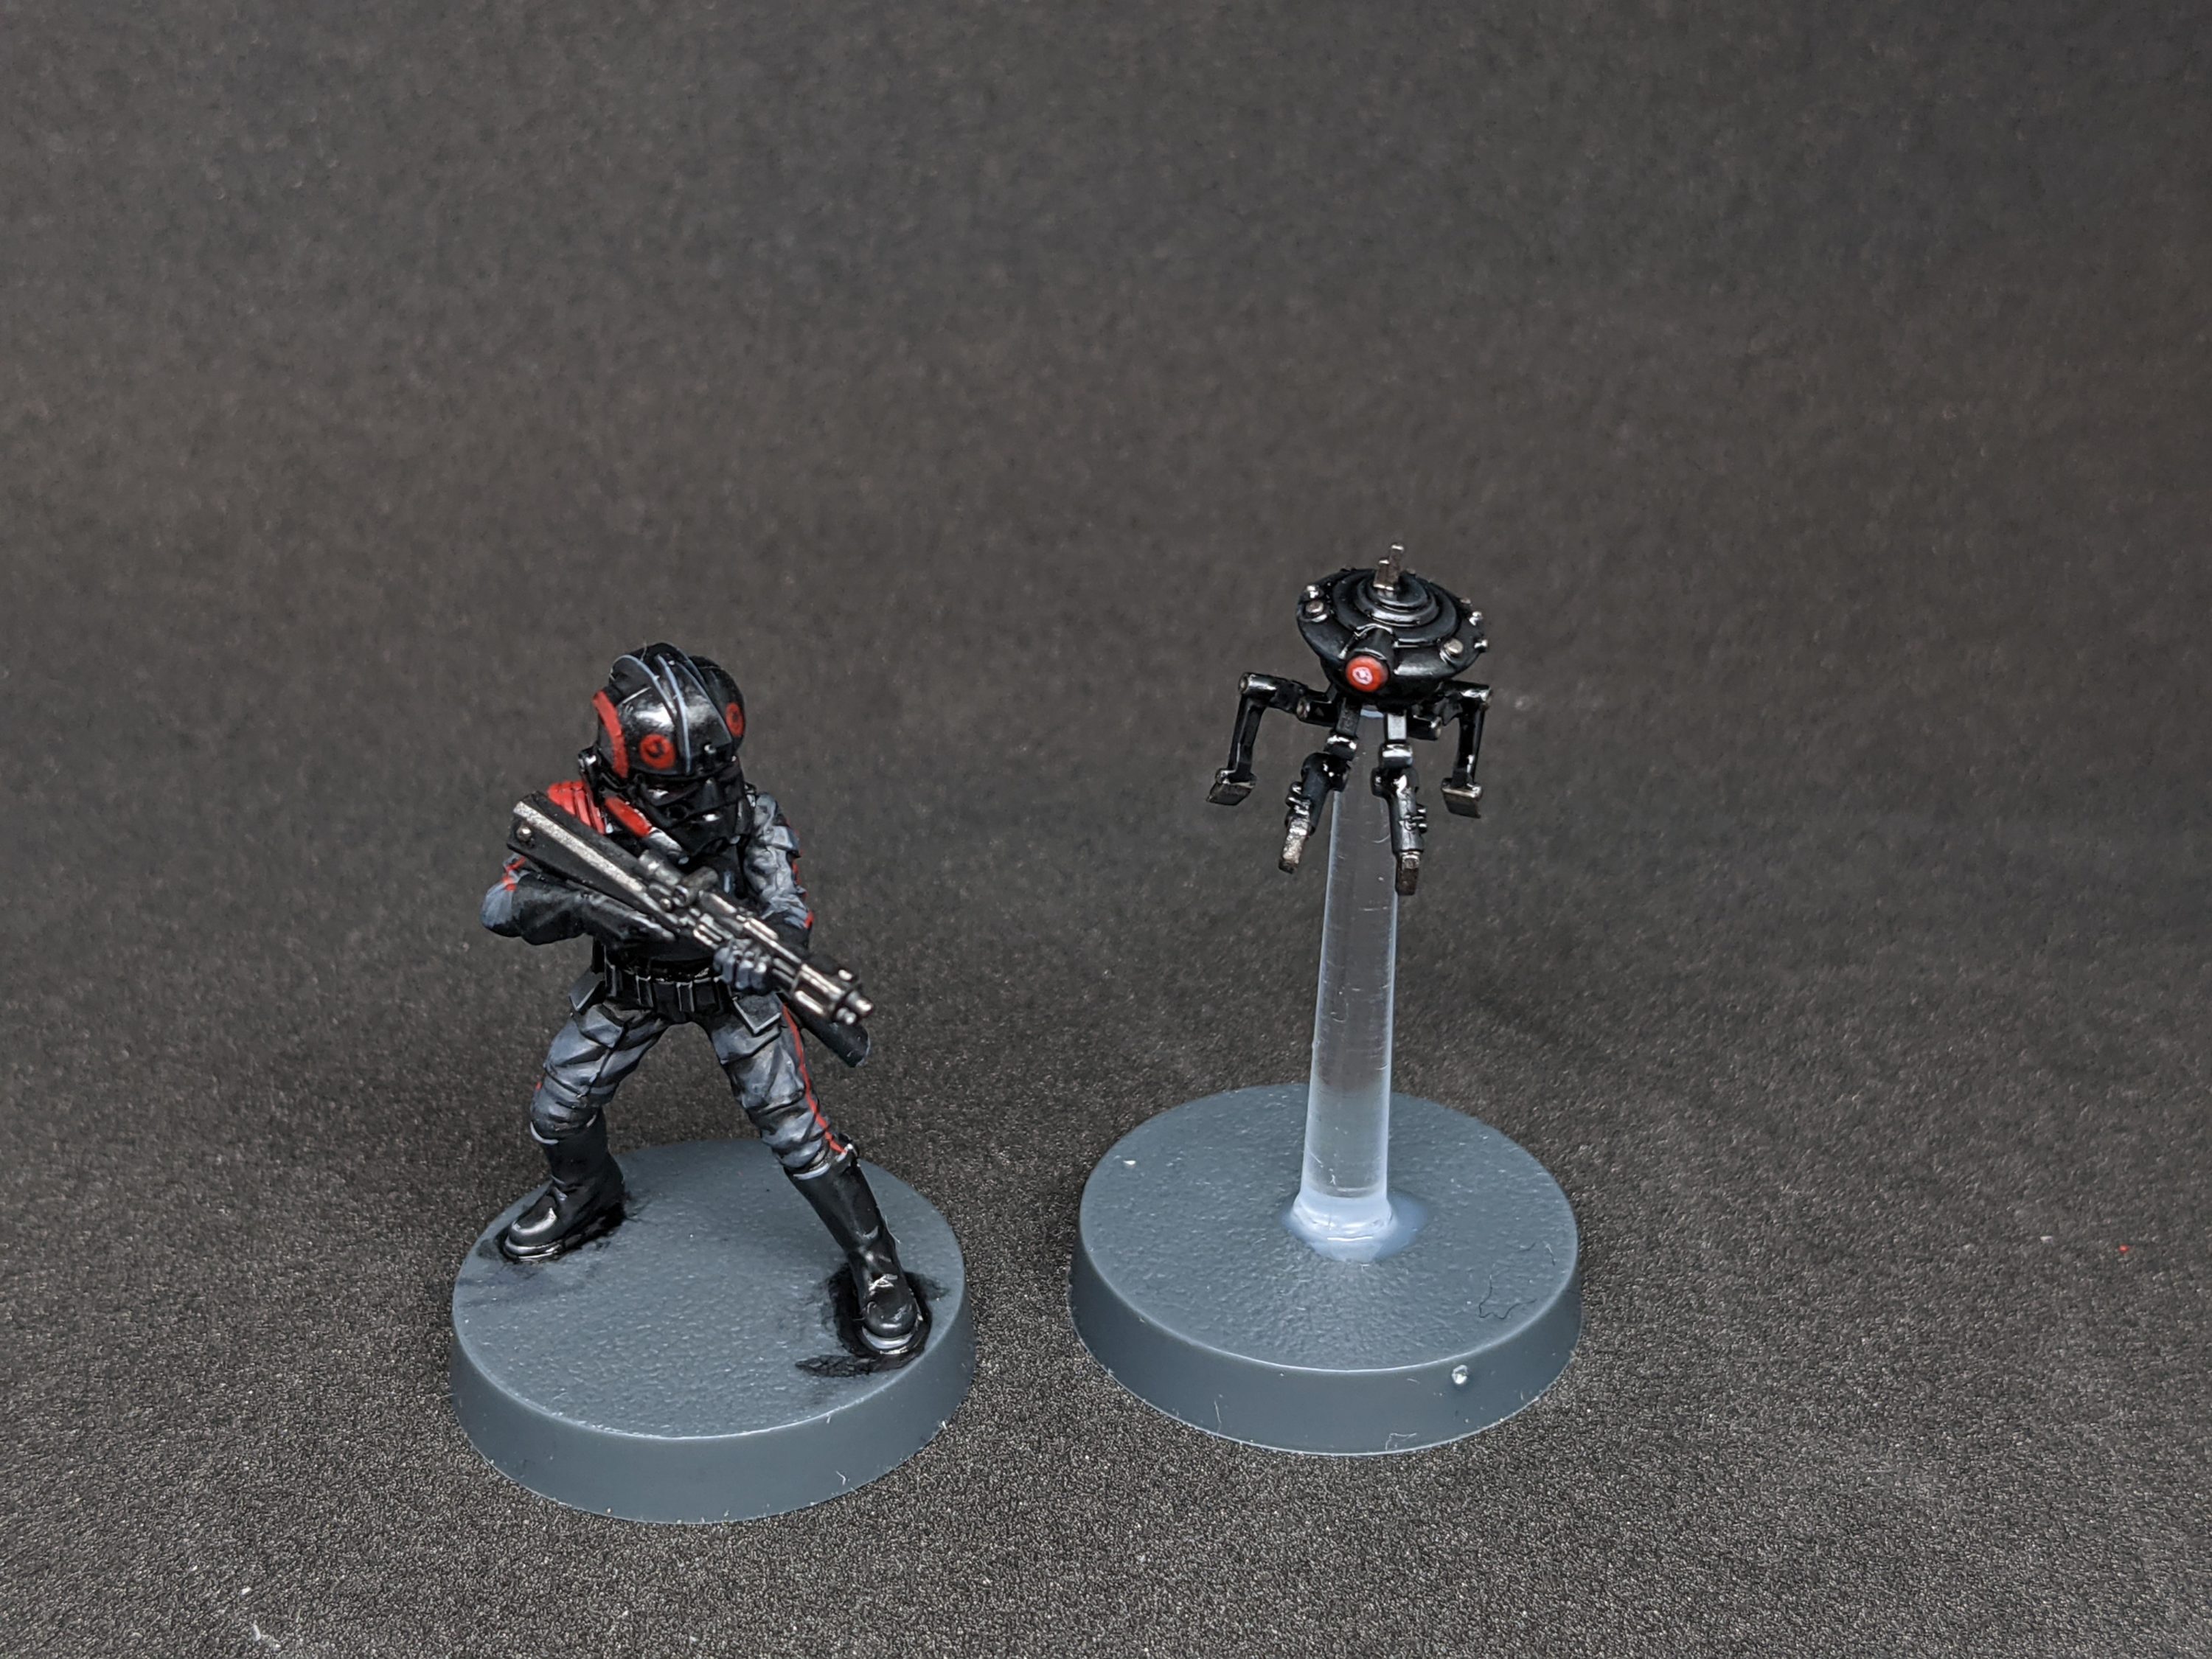
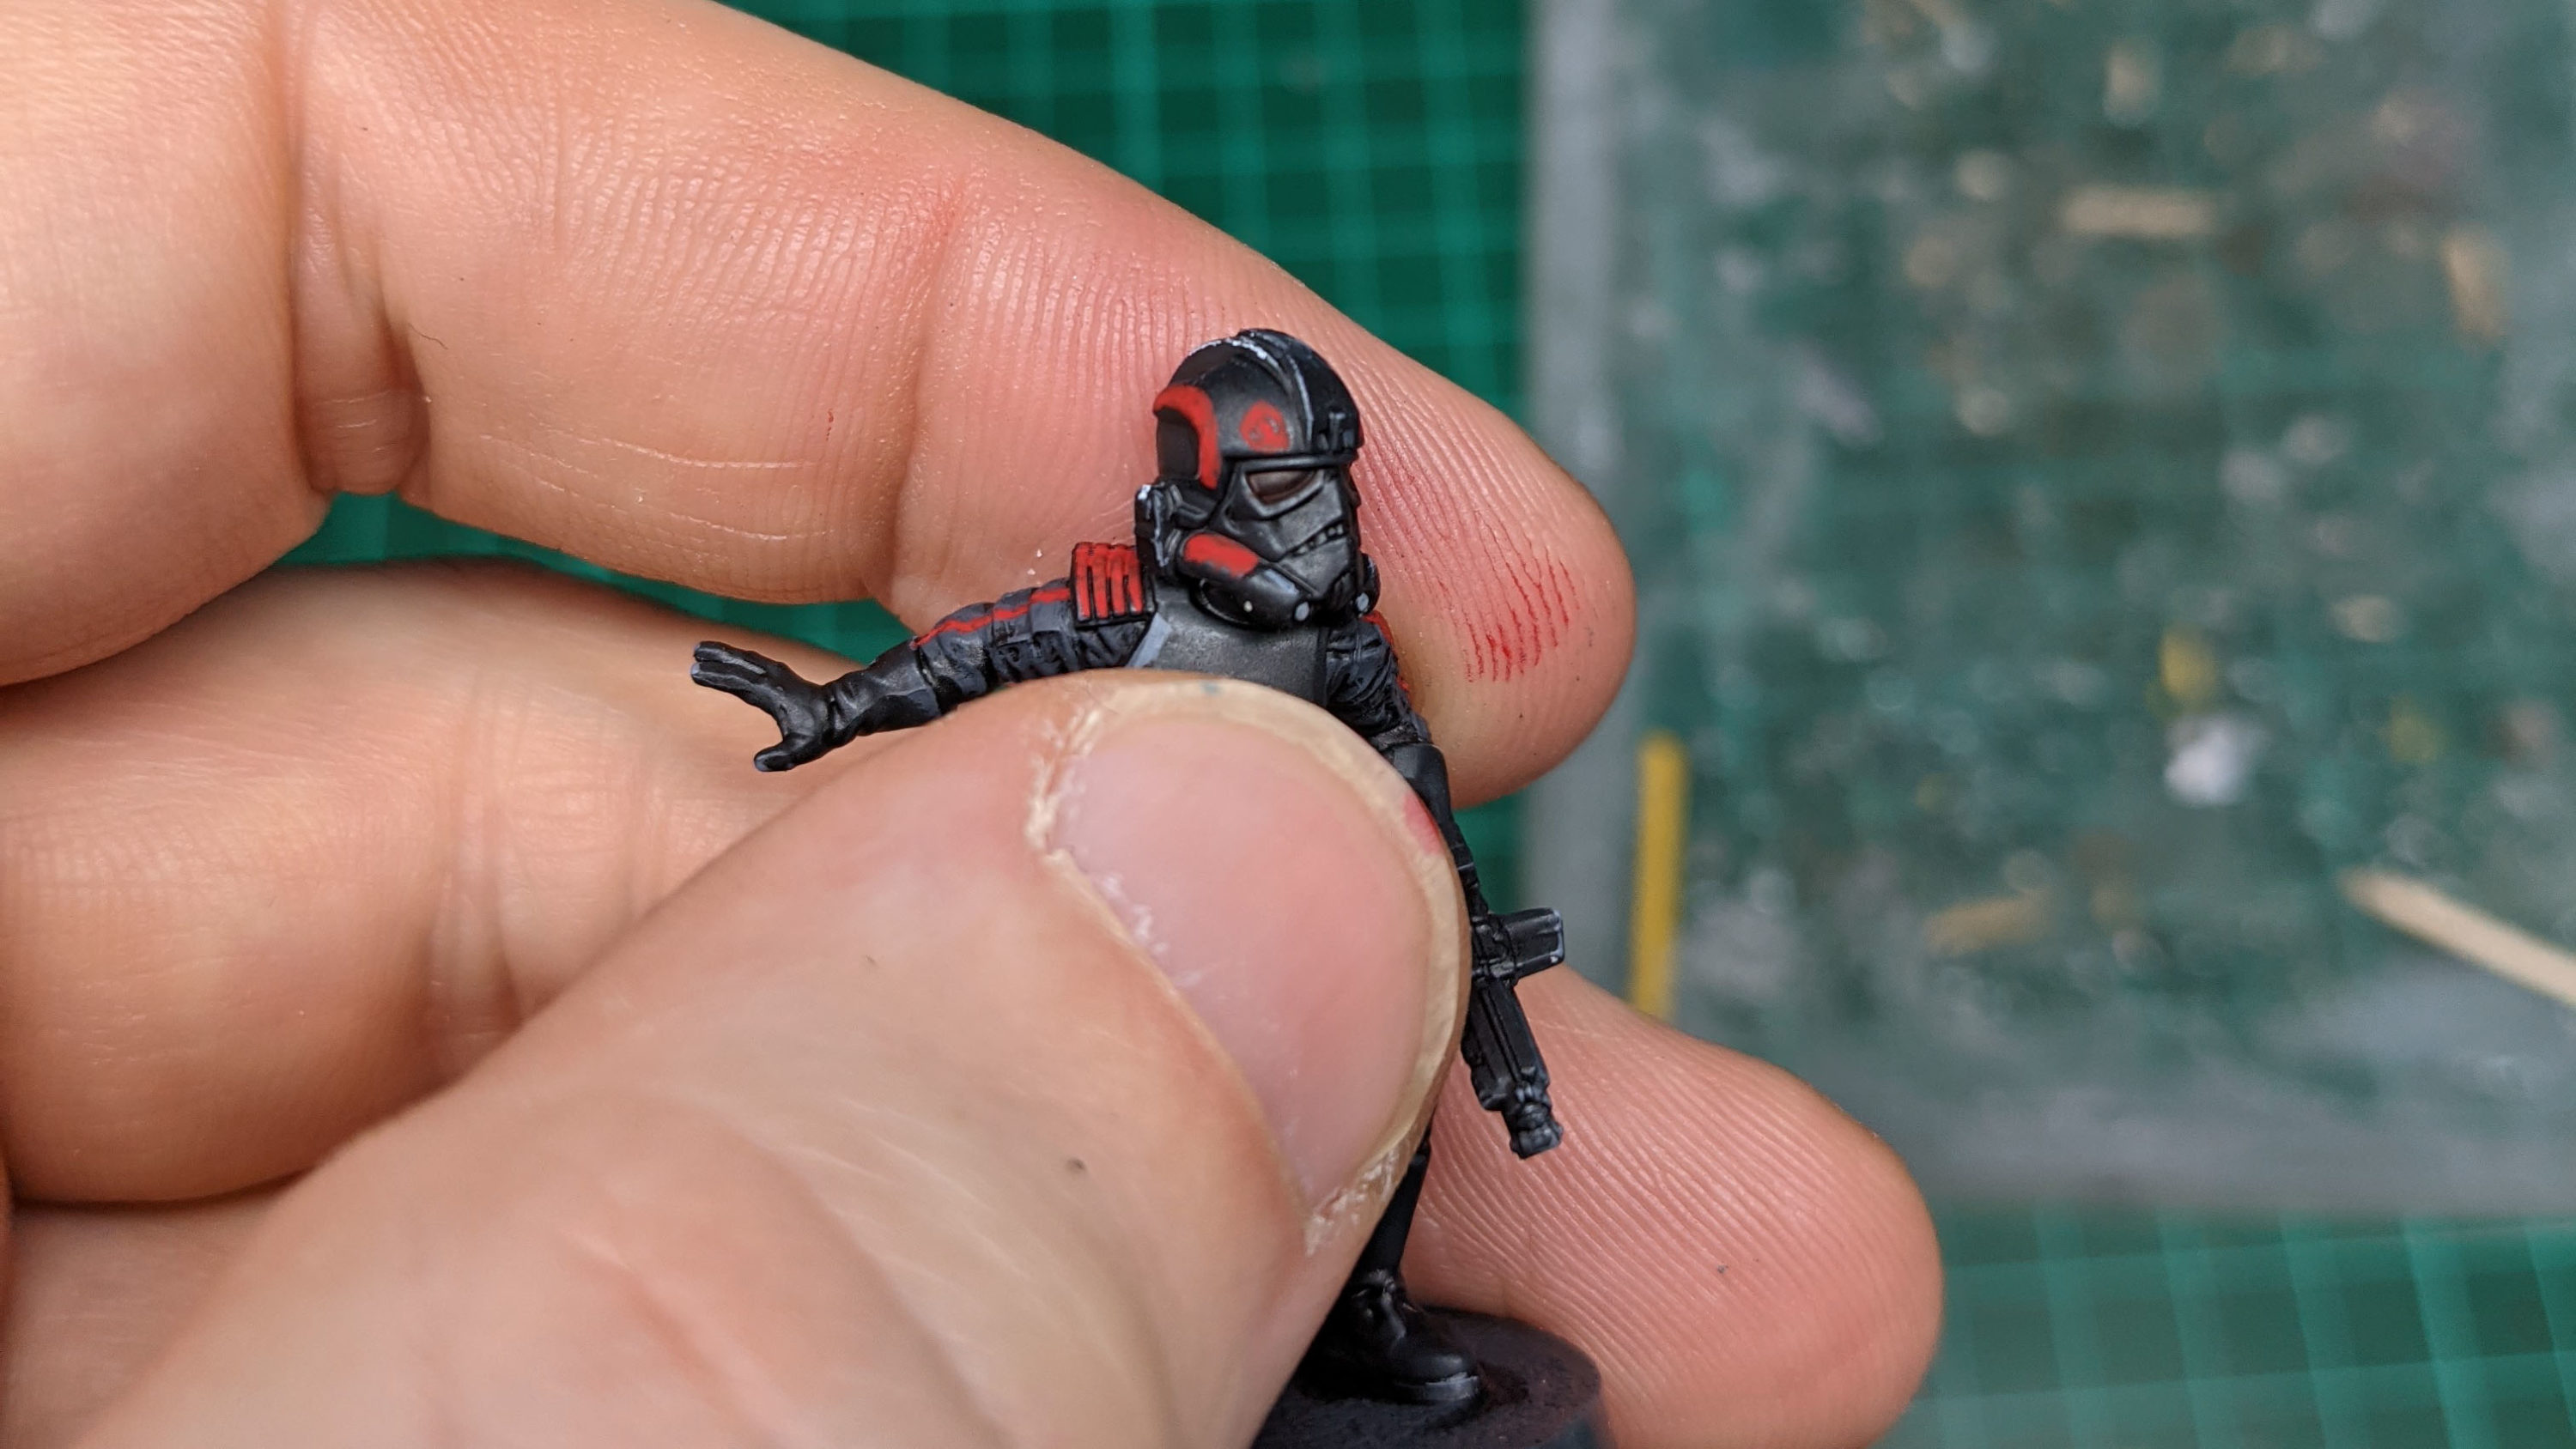
Now this is the point you want to add any red detailing (or other colours depending on the mini you’re painting). In my instance, I added 3 of the main Inferno Squad minis with red detailing, and then a bit of red detailing on the other special troopers. For this I used Mephiston Red.
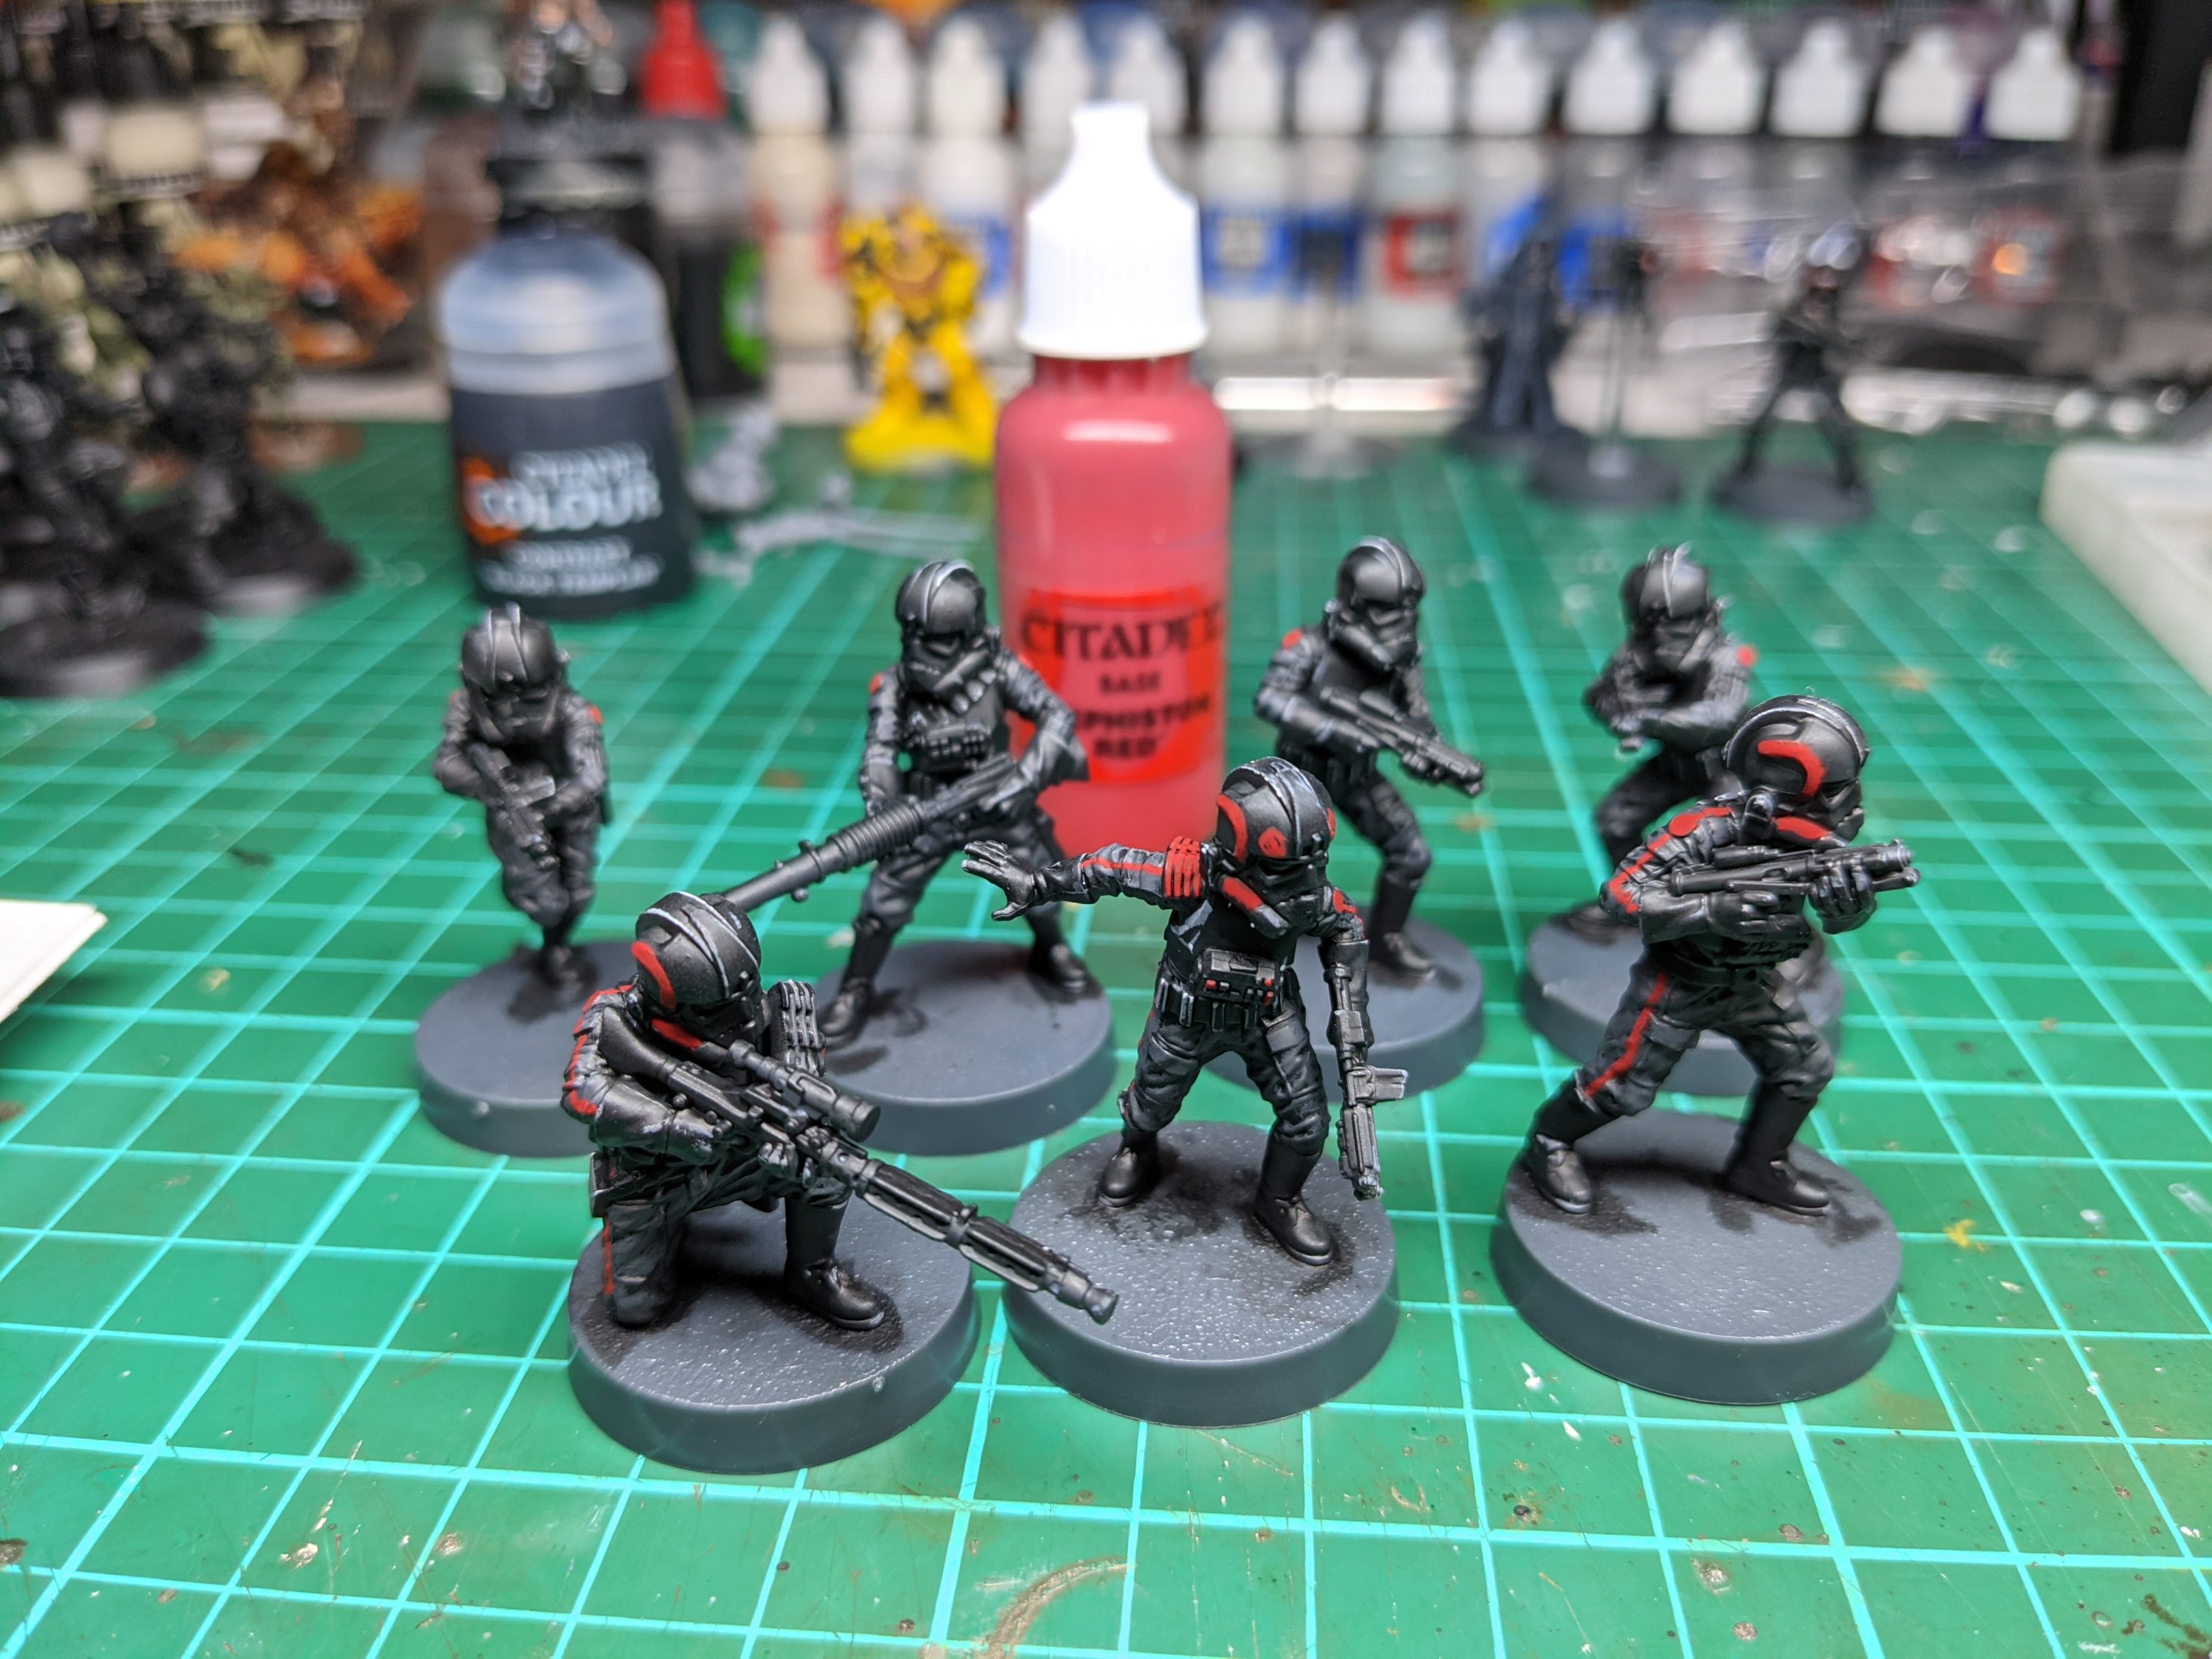
At the same time, I mixed a bit of Mephiston Red with a black colour (whatever your black or darkest grey is) and used that to fill the eyes on the helmets.
Next up we want to paint the Metal Color Jet Exhaust metallic paint on the weapons:

When that’s dry, crack the Contrast Black Templar back out and give the weapons a once-over to dull that silver even further:

And now the fun part. Get that Nuln Oil Gloss out and slap it all over the armoured parts. This should give them the shiny plastic feel and bring the scheme and minis to life.

And lastly, just bring up some edges and top panels on the weapons with and edge highlight of the same Metal Color Jet Exhaust.

And that’s you. All done. Once it’s dry you’re good to go.